Work and Time Management
The purpose of the Work and Time Management solution is to track the exact time employees spend on specific tasks during a certain period of time.
In SimpleOne, the time tracking is carried out with the help of timecards. There are two ways to create timecards:
- via the form of any object inherited from the Task (task) table.
- via the Timesheet page.
Time spent
You can write off the time spent via Task or any child table record form. To do so, complete the steps below:
-
Open the record of the task you work on.
-
Click Specify Time Spent in the top right corner.
-
A modal window appears where you can specify the time spent on the task and add a comment.
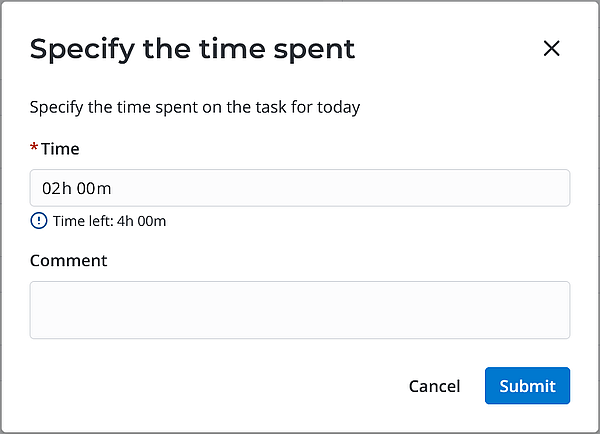
You can only specify the time spent on a task during the current day.
-
Click Save.
After saving, the message Time spent is saved pops up.
The specified time and comment are transferred to the timecard form in the corresponding field of the day. If today is Monday, then the Monday field is filled in, respectively.
Field changes are also displayed in the related fields on the Timesheet page.
If you open the modal window on the same day, the fields will contain the previously specified values. When you change values, the new values are transferred to the relevant cell of the Timesheet page.
Timesheet
The Timesheet page displays the widget that helps to create timecards and stores data.
To open the Timesheet, navigate to Time Entry Management → Timesheet.
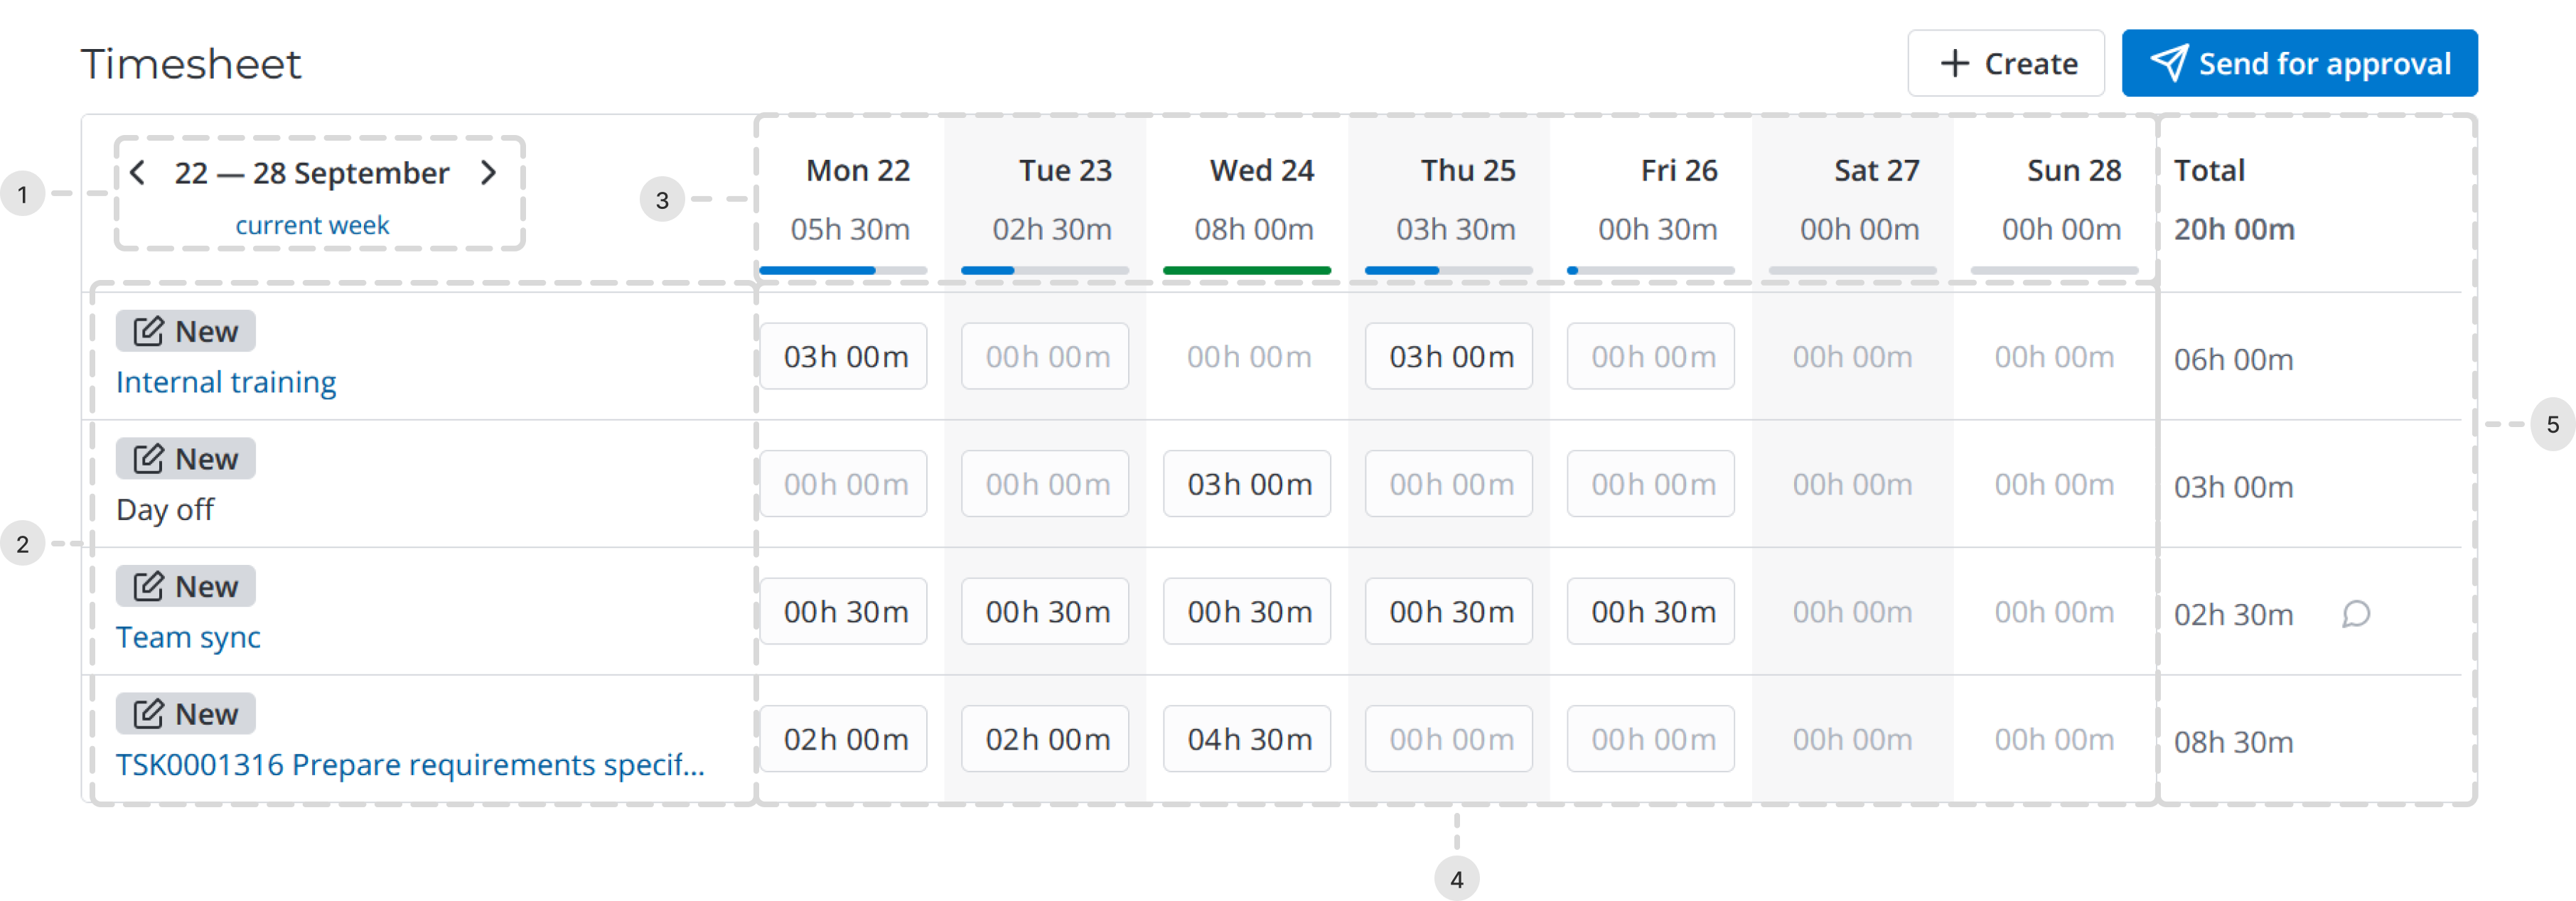
Timesheet consists of the following parts:
-
Week selection area.
- Click or to view the previous or next week.
- Click the link to return to the current week.
-
Timecards and their approval state.
- If the timecard has the Task activity selected, its title displays the Display name of the specified task record with the link to its form.
- If the timecard has any other activity selected with its type specified, the title displays the selected activity type with the link to its form.
-
Dates and days of week with the total time spent on all tasks within that day.
When filling in the timesheet, a color indicator is displayed under the day of the week:
- Blue – not all of the time from the set time limit according to the work schedule has been spent for the day.
- Green – the entire limit of the set time according to the work schedule for the day has been spent on tasks.
- Red – the limit of the set time according to the work schedule for the day has been exceeded.
The hints that appear when hovering over indicators contain the time left to specify or the overtime work.
-
Time cells.
- Click the time value in the cell to change it.
- Click the dialog icon (appears when hovering over the cell) to leave a comment to the time entry. After a comment is added the corresponding cell is marked with a green triangle in the top right corner.
-
Total time spent on all tasks in general and on each task separately.
- Click the dialog icon (appears when hovering over the row) to leave a comment to the timecard as a whole.
- Click the trash icon (appears when hovering over the row) to delete the time card with all its related time entries.
Create a timecard
To create a timecard in the timesheet, complete the steps below:
-
Click Create in the top right corner of the Timesheet.
-
By default, Task is selected in the Activity field. Specify the task you are working on in the Task field or select another activity. The Task field is then replaced with the Activity type field that you can use to more precisely classify the activity performed.
-
Click to select an existing activity type.
-
Click to create a new one:
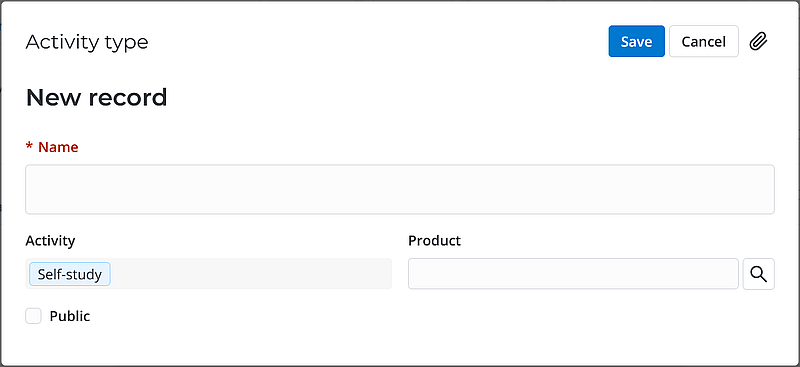
Fill in the fields according to the description and click Save.
-
-
Click Save.
Copy a timesheet
When you move to the next week, you can copy the activities from the previous week. Click Copy from the Previous Week.
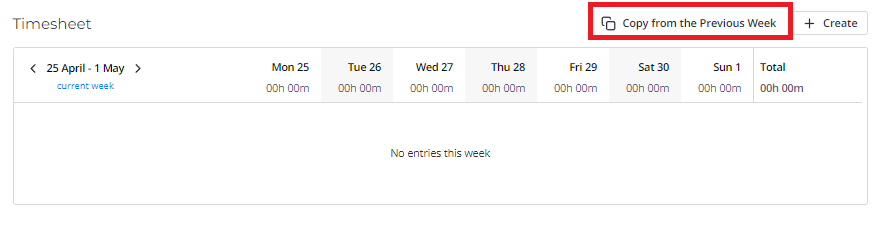
Activities will appear with the time spent specified and in the New state.
Comments will not be copied.
After activities are copied, the message The timesheet is copied pops up.
Approve a timesheet
When you click Send for approval, the timesheet will be sent to the manager for approval. The following message pops up: The timesheet for {date} is submitted for approval. The states of activities change from New to Approving.
Then, your manager should approve or reject it. If they approve it, the activity states change to Approved. If it is rejected, the activity states change to Rejected.
If an employee does not have a manager, or they are a manager, timecards will be approved automatically after they click Submit. The following message pops up: The timesheet for {date} was submitted.
Timecard
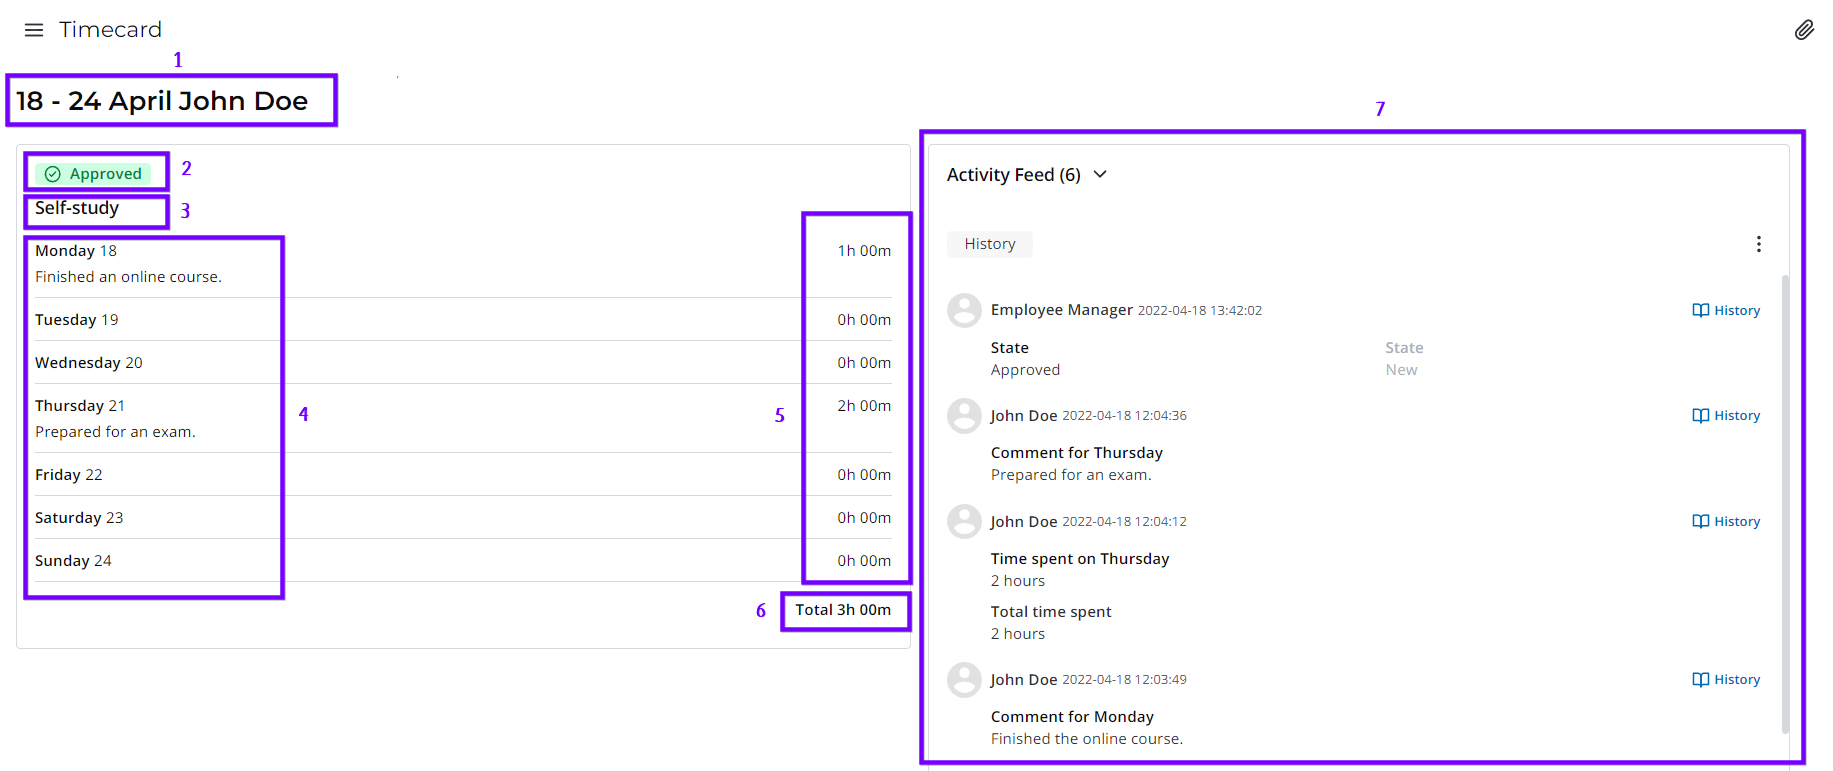
The Timecard (wtm_timecard) table stores the information about the time spent on specific tasks during the week. When you open any record, the form has the following view:
- Date range of the week and the Display Name of the employee who created the timecard.
- State of the timecard.
- Activity type or name of the task and a link to the task record.
- Date and days of the week with comments, if any.
- Time spent on the activity for each day of the week.
- Total time spent on the activity.
- The Activity Feed that shows the history of field changes.
To open the list of your timecards, navigate to Time Entry Management → My Timecards.
In the Timecard (wtm_timecard) table, employees can read only their timecard records. They cannot edit them.
Dashboard "My Time Entries"
Employees have access to a dashboard with four pre-configured reports on time entries.
Navigate to Time Entry Management → Dashboards → My Time Entries to open it.
Available reports:
- Last week – the total time spent on tasks for the past week.
- Last month – the total time spent on tasks for the past month.
- This week – the total time spent on tasks for the current week.
- This month – the total time spent on tasks for the current month.
You can customize the report conditions. See the Reports section to learn more.
Dashboard "Subordinates' Time Entries"
Managers have access to a dashboard with pre-configured reports on employee time entries.
Navigate to Time Entry Management → Dashboards → Subordinates' Time Entries to open it.
Available reports:
- Yesterday – the total time spent by subordinates on tasks for the previous day.
- This week – the total time spent by subordinates on tasks for the current week.
- By groups this week – the total time spent by groups of subordinates on tasks for the current week.
- By groups on tasks last month – the total time spent by groups of subordinates on tasks for the last month.
- By employees on tasks last month – the total time spent by subordinates for the last month, broken down by tasks with the ability to view the time entries of a specific employee.
- On tasks last week – the total time spent by subordinates for the last week, broken down by tasks.
- On tasks by days last month – the total time spent by subordinates for the last month, broken down by tasks.
- For tasks in the last quarter – the total time spent by subordinates for the last quarter, broken down by tasks.
You can customize the report conditions. See the Reports section to learn more.