Timesheet
The Timesheet page provides a week-by-week overview of the time spent on tasks and other activities, allows to create timecards, and submit them for your manager's approval.
Users with admin or wtm_admin role have no access to the Timesheet page.
To open the timesheet, navigate to Time Entry Management → Timesheet.
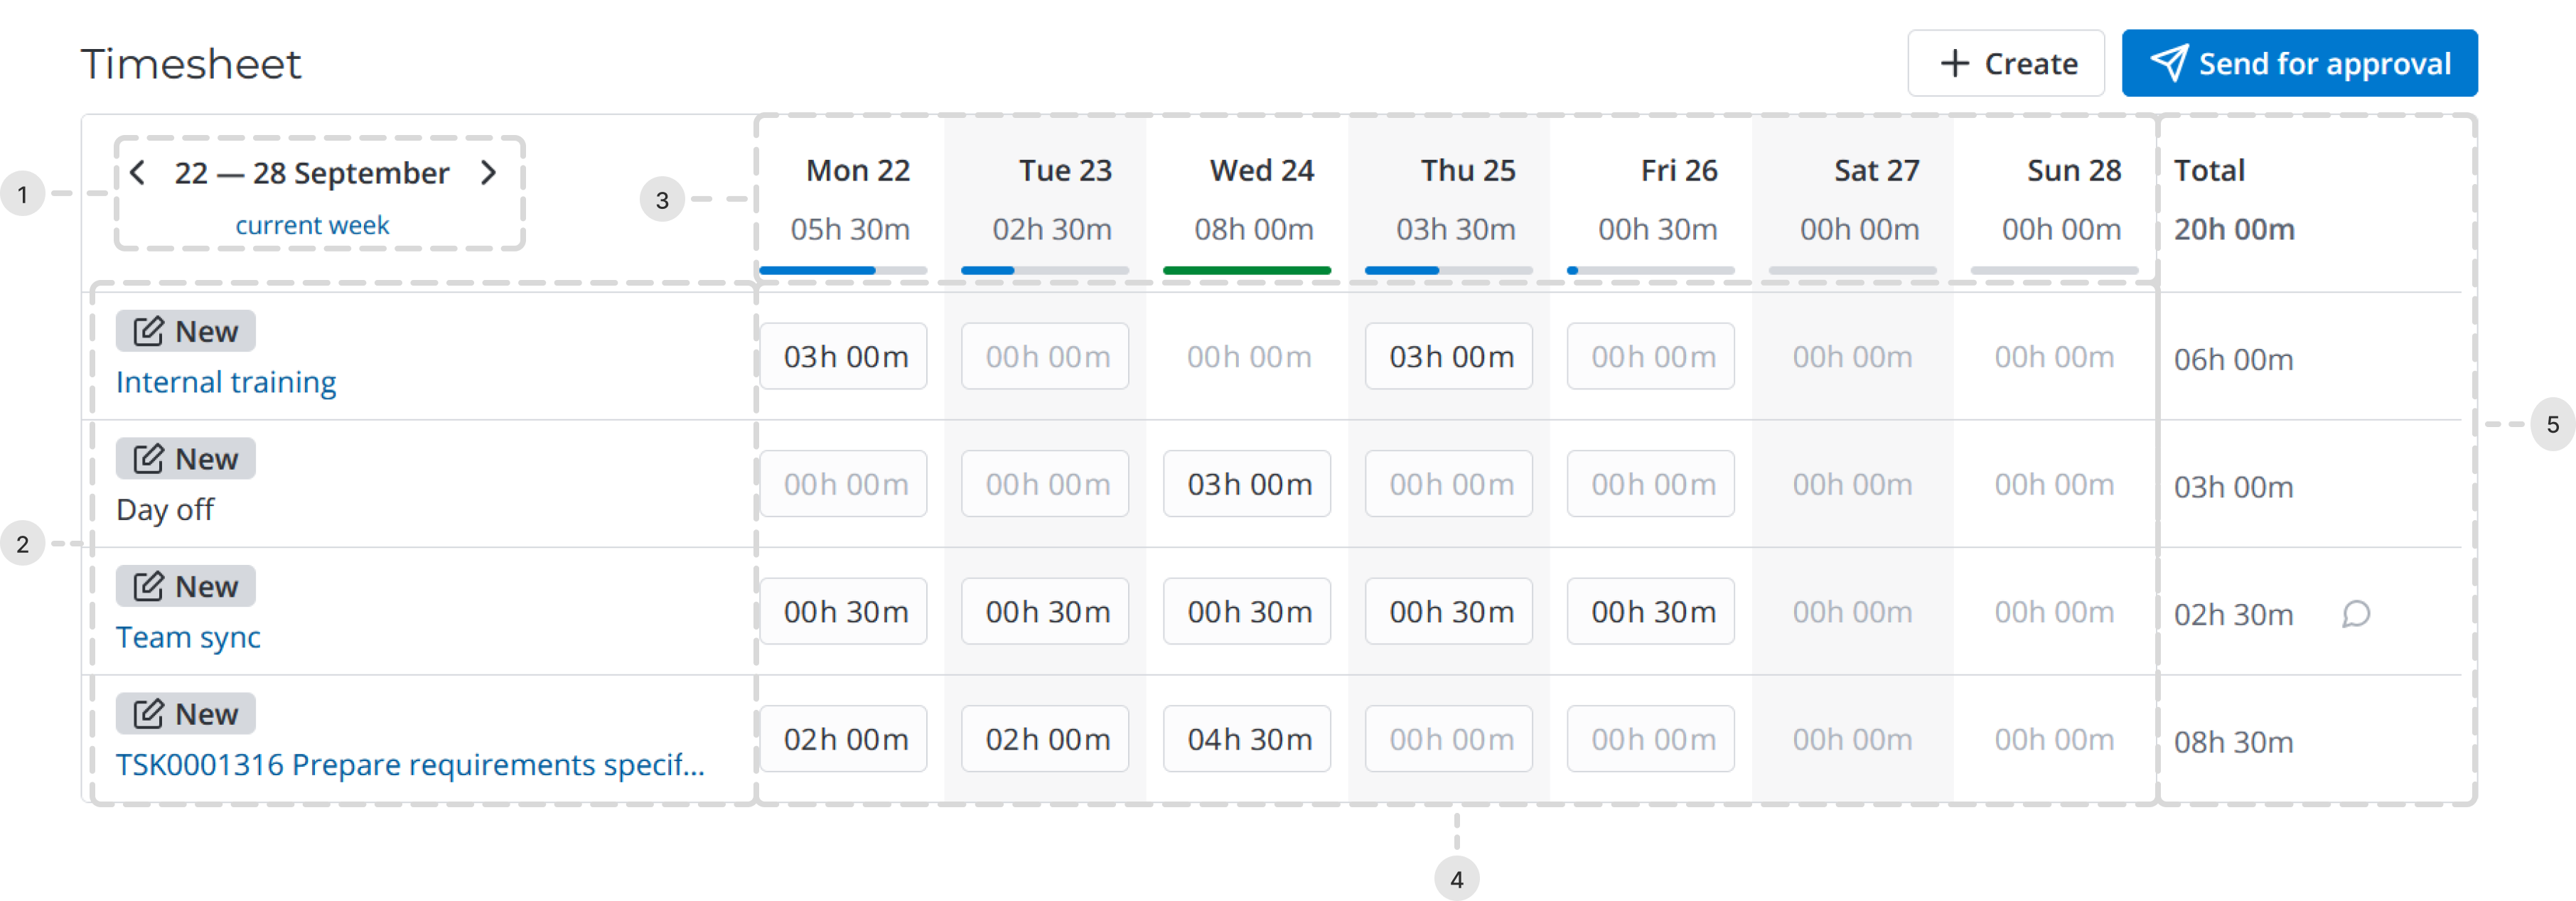
Timesheet interface
Timesheet consists of the following parts:
-
Week selection area.
- Click or to view the previous or next week.
- Click the link to return to the current week.
-
Timecards and their approval state.
- If the timecard has the Task activity selected, its title displays the Display name of the specified task record with the link to its form.
- If the timecard has any other activity selected with its type specified, the title displays the selected activity type with the link to its form.
-
Dates and days of week with the total time spent on all tasks within that day.
When filling in the timesheet, a color indicator is displayed under the day of the week:
- Blue – not all of the time from the set time limit according to the work schedule has been spent for the day.
- Green – the entire limit of the set time according to the work schedule for the day has been spent on tasks.
- Red – the limit of the set time according to the work schedule for the day has been exceeded.
The hints that appear when hovering over indicators contain the time left to specify or the overtime work.
-
Time cells.
- Click the time value in the cell to change it.
- Click the dialog icon (appears when hovering over the cell) to leave a comment to the time entry. After a comment is added the corresponding cell is marked with a green triangle in the top right corner.
-
Total time spent on all tasks in general and on each task separately.
- Click the dialog icon (appears when hovering over the row) to leave a comment to the timecard as a whole.
- Click the trash icon (appears when hovering over the row) to delete the time card with all its related time entries.
Create a timecard
To create a timecard in the timesheet, complete the steps below:
-
Click Create in the top right corner of the Timesheet.
-
By default, Task is selected in the Activity field. Specify the task you are working on in the Task field or select another activity. The Task field is then replaced with the Activity type field that you can use to more precisely classify the activity performed.
-
Click to select an existing activity type.
-
Click to create a new one:
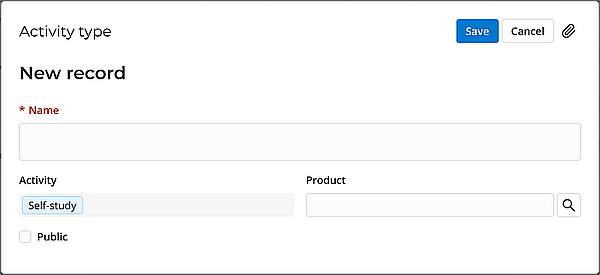
Fill in the fields according to the description and click Save.
-
-
Click Save.
Copy timecards
When you move to the next week, you can copy the timecards from the previous week. Click Copy from the Previous Week.
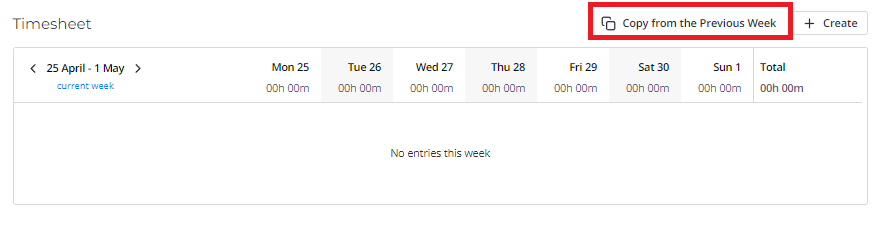
Activities will appear with the time spent specified and in the New state.
Comments will not be copied.
After activities are copied, the message The timesheet is copied pops up.
Timesheet approval
Send for approval
As an employee, click Send for approval, the timesheet will be sent to the manager for approval. The following message pops up: The timesheet for {date} is submitted for approval. The states of activities change from New to Approving.
Then, your manager must review all the timecards included in the submitted timesheet and either approve or reject them:
- If they approve a timecard, its state is changed to Approved.
- If they reject a timecard, its state is changed to Rejected and the icon appears next to its state badge. Click it to view the manager's comment, make necessary corrections in the timesheet and click Send for approval again.
If you have no manager, timecards will be approved automatically after you click Send for approval. The following message pops up: The timesheet for {date} was submitted.
Approve a timesheet
As a manager, when a subordinate submits their timesheet for approval, you must approve or reject the timecards included in the submitted timesheet. To do so, complete the following steps:
-
Navigate to My Work → Timecards Approvals.
The list opens with all timecards submitted for approval by your subordinate employees.
-
Open the Timecard you need to approve or reject.
-
On the form:
-
To approve the timecard, click Approve in the top right corner of the form.
-
To reject the timecard, click Reject in the top right corner of the form.
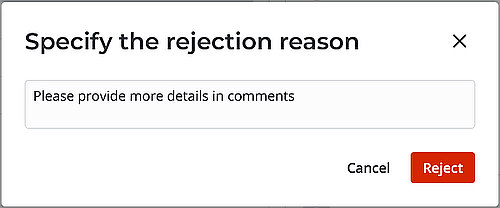
Add a comment for the employee and click Reject.
-
-
If necessary, return to the list and repeat these steps for other timecards.
Timesheet table
The Timesheet (wtm_timesheet) table is used to store the data displayed on the Timesheet page.
- Only users with admin or wtm_admin role can create, delete, edit, and read the records of this table.
- Do not modify the values in the record fields, as this will cause incorrect data to be displayed on the Timesheet page.
A timesheet record contains the following information:
- Employee
- Week start date
- Total time spent
- Time spent on [Day of the week]